Migrate a blog from Ghost to Quarto
When I started blogging five years ago, I read all reddit posts comparing blogging platforms and concluded that Ghost was the best choice because I needed a powerful tool for all those millions of visitors my blog would get.
I saw myself as the García Márquez of technical writing.
Fast forward five years, and I’ve paid $2,000 for hosting a blog that barely gets 8k visits per month. Plus, I’m forced to write it in an interface that I hate.
With that kind of money, I could have funded a moderately extravagant hamster-only summer party.
Not that I should, but I could.
Yes, I’m not proud of that decision1. So I’m migrating my blog from Ghost to Quarto.
Here’s a short guide on how to migrate your blog from Ghost to Quarto.
Migrate blog from Ghost to Quarto
Setting up your blog
First, install Quarto and create a blog in an empty repository:
The resulting myblog folder will contain the barebones configuration for a Quarto blog and a posts folder with some example posts. You can remove those posts. Later on, you’ll add your own.
Exporting your Ghost’s blog content
Then, you need to download a copy of your Ghost’s blog content.
Go to <YOUR_BLOG_URL>/ghost/#/settings/migration and click on Export, then Export JSON.
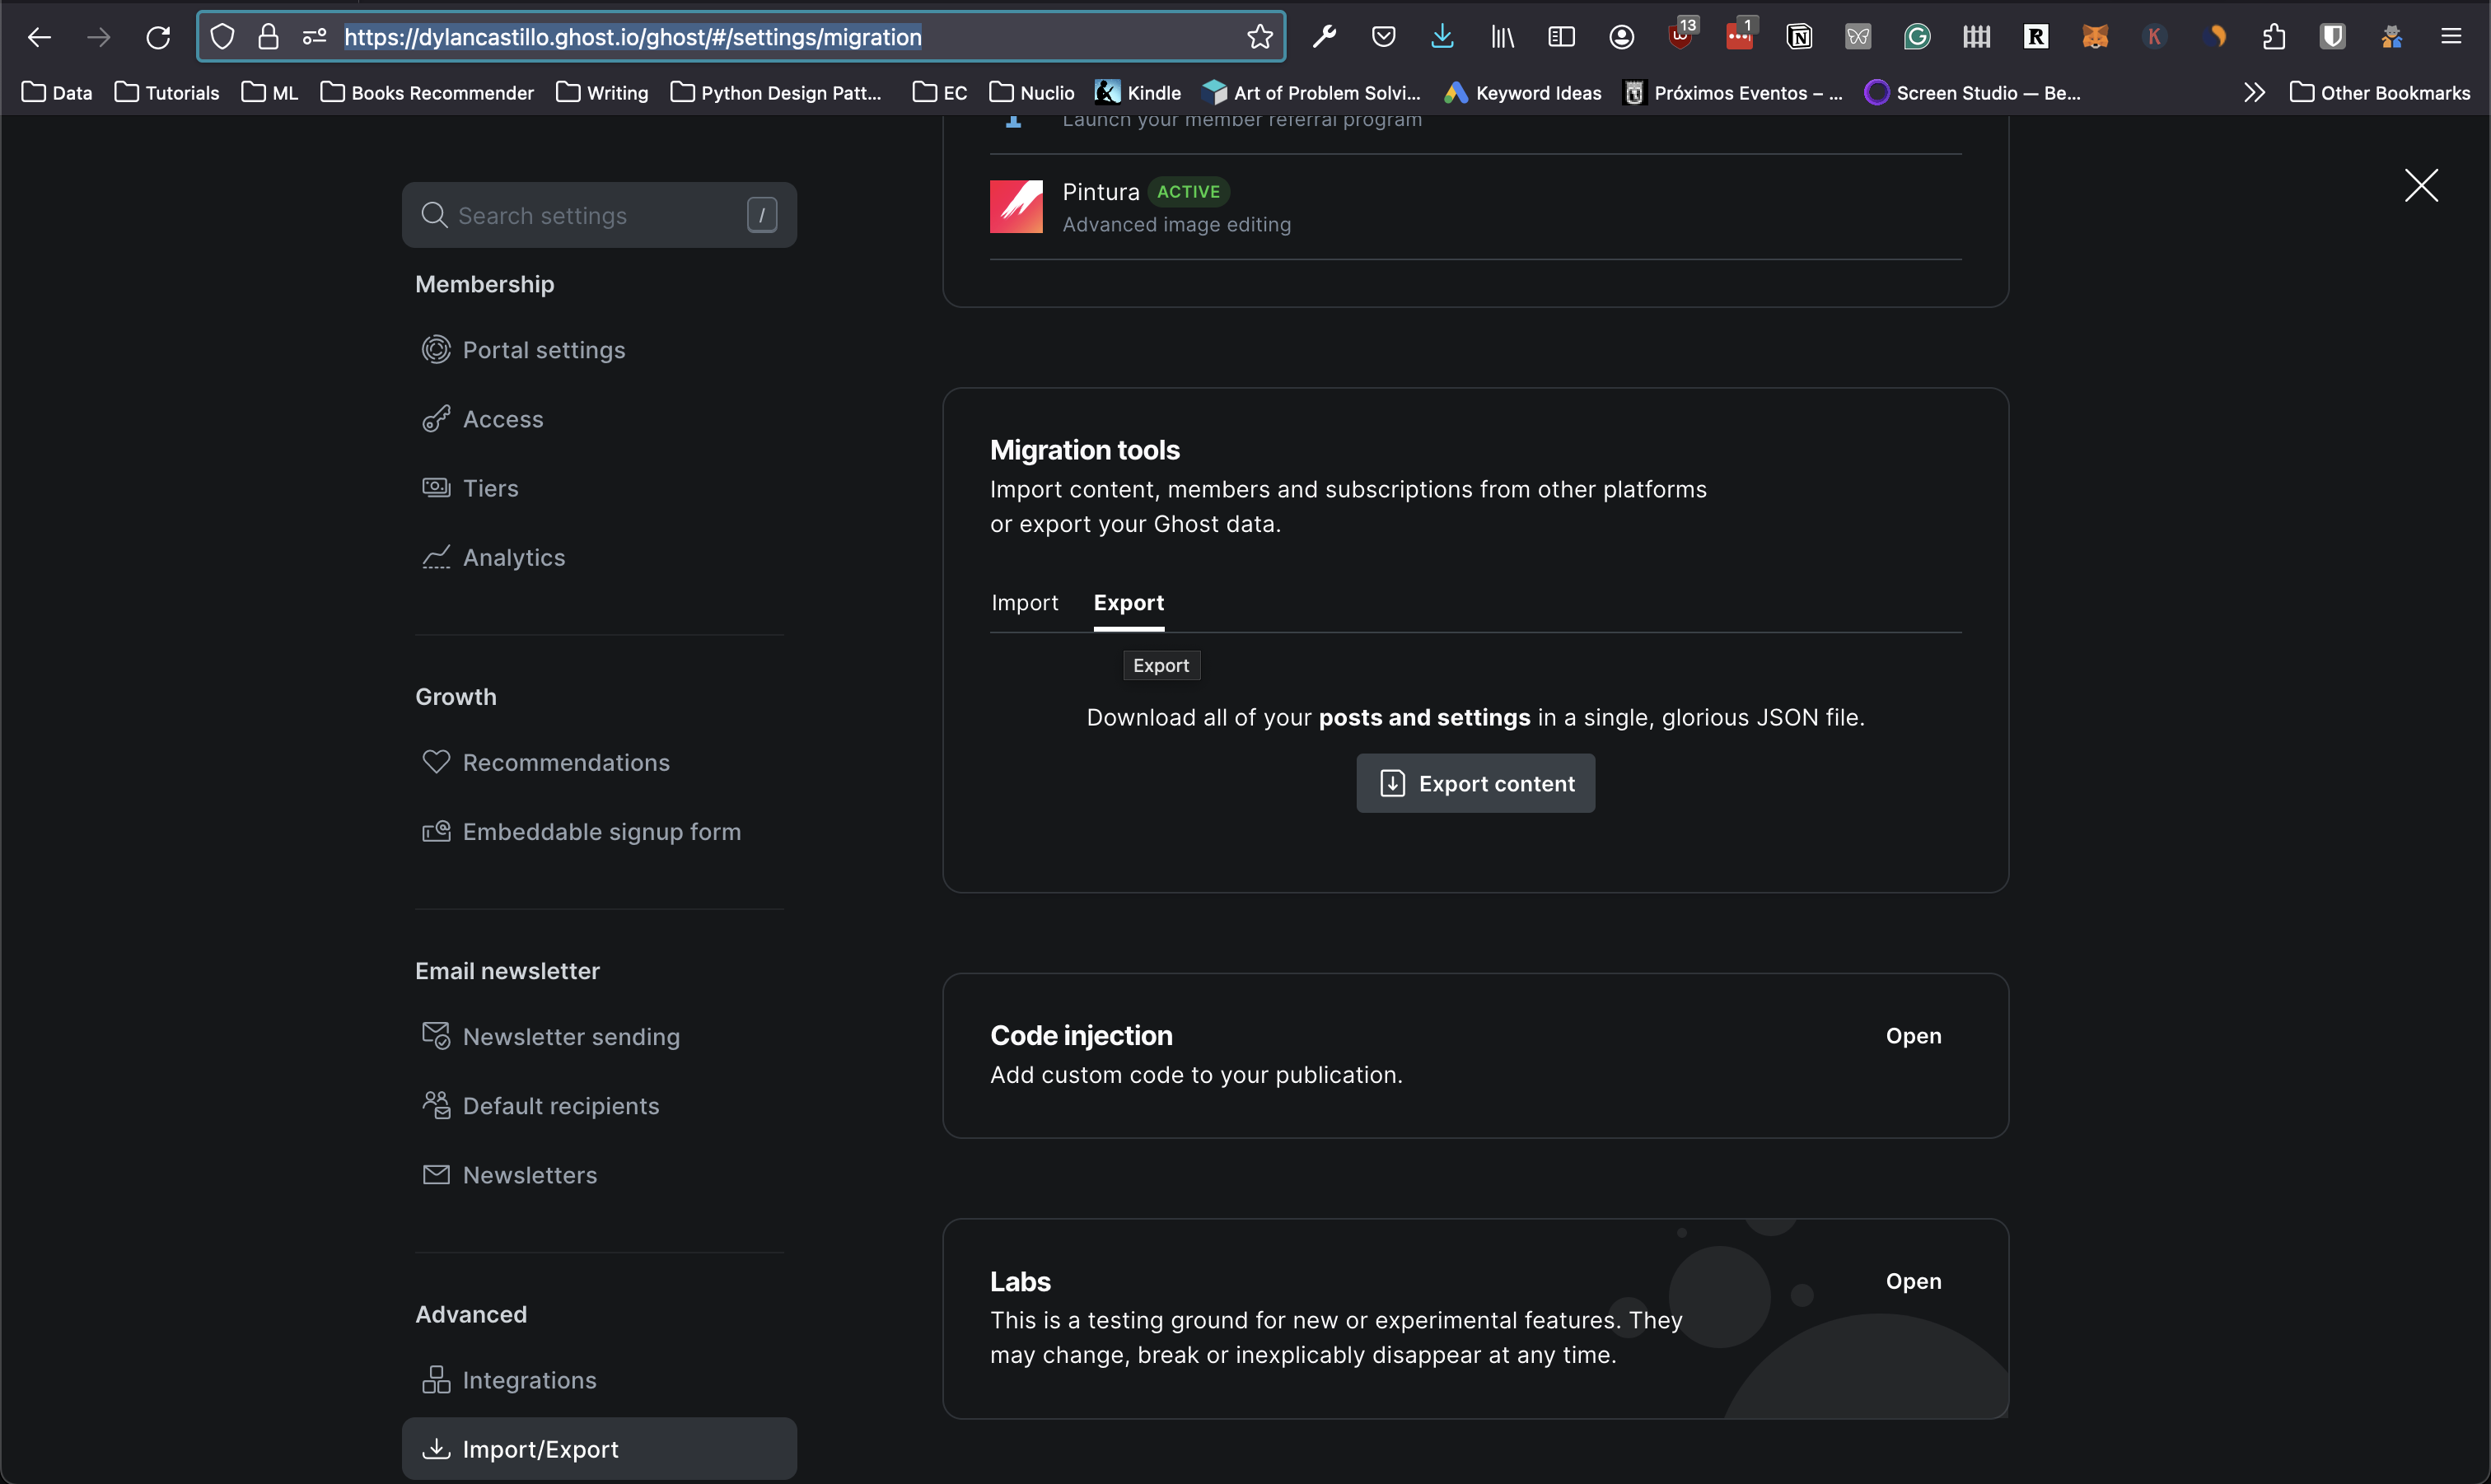
This is pretty obvious, but remember to replace <YOUR_BLOG_URL> with your blog’s URL.
You’ll get a JSON file with all the posts and pages in your blog. You’ll need to process it to convert your posts to Quarto posts.
This small Python script did the heavy lifting for me:
Show the code
import json
import os
from datetime import datetime

import requests
from bs4 import BeautifulSoup
from markdownify import markdownify as md


BLOG_URL = "https://dylancastillo.co" # Replace with your blog's URL
BLOG_JSON_DUMP = "./dylan-castillo.ghost.2024-05-28-10-39-09.json" # Replace with the path to the JSON file you downloaded
BLOG_AUTHOR_NAME = "Dylan Castillo" # Replace with your name


def download_images(markdown_content, post_slug):
    soup = BeautifulSoup(markdown_content, "html.parser")
    images = soup.find_all("img")
    if images:
        os.makedirs(post_slug, exist_ok=True)
        for img in images:
            img_url_raw = img["src"]
            img_url = img_url_raw.replace("__GHOST_URL__", BLOG_URL)
            img_name = os.path.basename(img_url)
            response = requests.get(img_url, stream=True)
            if response.status_code == 200:
                print(f"Downloading image: {img_url} to {post_slug}/{img_name}")
                with open(os.path.join(post_slug, img_name), "wb") as f:
                    f.write(response.content)
                markdown_content = markdown_content.replace(
                    img_url_raw, os.path.join(post_slug, img_name)
                )
            else:
                print(f"Failed to download image: {img_url}")
    return markdown_content


def process_posts(data):
    posts = data["db"][0]["data"]["posts"]
    for post in posts:
        print("Processing post:", post["title"])
        title = post["title"]
        description = post["custom_excerpt"]
        author = BLOG_AUTHOR_NAME
        date = (
            datetime.strptime(post["published_at"], "%Y-%m-%dT%H:%M:%S.%fZ").strftime(
                "%m/%d/%Y"
            )
            if post["published_at"]
            else ""
        )
        date_modified = (
            datetime.strptime(post["updated_at"], "%Y-%m-%dT%H:%M:%S.%fZ").strftime(
                "%m/%d/%Y"
            )
            if post["updated_at"]
            else ""
        )

        # Convert HTML content to Markdown
        markdown_content = download_images(
            post["html"] if post["html"] else "", post["slug"]
        )
        markdown_content = md(markdown_content, code_language="python")
        markdown_content = markdown_content.replace("__GHOST_URL__", BLOG_URL)
        markdown_content = f"""---\ntitle: "{title}"\ndescription: "{description}"\nauthor: "{author}"\ndate: "{date}"\ndate-modified: "{date_modified}"\n---\n\n{markdown_content}"""

        # Save the markdown content to a file
        filename = f"{post['slug']}.md"
        with open(filename, "w", encoding="utf-8") as file:
            file.write(markdown_content)


if __name__ == "__main__":
    with open(BLOG_JSON_DUMP) as file:
        data = json.load(file)
    process_posts(data)
When you run the script, it will create a folder with all the posts in .md format and their images. Feel free to adapt it to your needs.
Customizing your blog
Through trial and error, I found some settings that helped me customize the look and feel of my blog.
Here are some of the things I modified:
- Added RSS, favicon, and customized the navbar:
_quarto.yml
- Added custom CSS and JS and a custom theme:
_quarto.yml
format:
  html:
    include-in-header:
      - text: |
          <link href="<YOUR_CUSTOM_FONT_URL>" rel="stylesheet">
          <script src="<YOUR_CUSTOM_JS_URL>" defer></script>
    page-layout: "article"
    theme: # Pick a theme and customize it in `custom.scss`
      - <YOUR_THEME>
      - custom.scss # Add your custom CSS here
code-line-numbers: true # Add line numbers to code blocks- For each post, I used this front matter:
<POST_SLUG>.md
---
title: "<POST_TITLE>"
aliases:
  - /<POST_SLUG>/ # Add an alias to the previous post's URL
description-meta: "<POST_DESCRIPTION>"
date: "<POST_DATE>"
date-modified: last-modified # Automatically set to the last modified date
toc: true
toc-depth: 3
lightbox: true # For images
fig-cap-location: margin # Captions for images
categories:
  - <CATEGORY>
author:
  - name: <AUTHOR_NAME>
    url: <AUTHOR_URL>
    affiliation: <AUTHOR_AFFILIATION>
    affiliation-url: <AUTHOR_AFFILIATION_URL>
citation: true
comments:
  utterances: # For comments
    repo: <YOUR_GITHUB_USERNAME>/<YOUR_GITHUB_REPO>
    issue-term: pathname
---
See my settings for an example and a recent post source for reference.
For the CSS, I copied darkly and created a custom custom.scss file to modify some Bootstrap styles. I just changed some colors and a couple of styles to make the blog look closer to my Ghost theme. It was super easy.
Deployment using GitHub Pages + GitHub Actions
Quarto offers multiple deployment options. I wanted one where I could push changes to a GitHub repository, and have the blog automatically deployed. I went with GitHub Pages combined with GitHub Actions.
To deploy the blog, I created a GitHub repository, added the blog’s content, updated .gitignore to ignore the /.quarto/ and /_site/ and updated _quarto.yml to only compute code locally (otherwise you’d need a Python kernel running on your GitHub Actions runner):
Then I ran this command to automatically generate the workflow .github/workflows/publish.yml for me:
Since then, every time I push changes to the main branch, GitHub Actions automatically renders the website and updates the gh-pages branch.
Using a custom domain
That seemed to work at first, but very quickly I noticed that whenever I pushed changes to the main branch, the site would no longer be served from my custom domain dylancastillo.co.
When you render your website, Quarto recreates the CNAME file in the gh-pages branch, which seems to break the custom domain setup in GitHub Pages.
I found a solution in this discussion and added a CNAME file to the root of the repository with my custom domain:
Then, I added this to _quarto.yml:
And that worked!
Conclusion
There you go, my friend.
Now you can also break free from Ghost.
See you in the next post.
Footnotes
Choosing Ghost. No regrets about the hypothetical hamster party.↩︎
Citation
@online{castillo2024,
  author = {Castillo, Dylan},
  title = {Migrate a Blog from {Ghost} to {Quarto}},
  date = {2024-06-16},
  url = {https://dylancastillo.co/til/migrate-blog-from-ghost-to-quarto.html},
  langid = {en}
}